In the dynamic field of app development, push notifications have solidified their role as indispensable tools for boosting user engagement. Yet, the process of successfully integrating these unobtrusive messages into your app can often be complex and demanding. In this comprehensive guide, we’re here to illuminate the path toward effortless push notification management, all thanks to the robust capabilities of Amity’s Development Kit. We’ll carefully navigate the steps involved in registering and unregistering devices for push notifications, empowering you to master this crucial feature with ease.
Prerequisites
- If you haven’t already registered for an Amity account, we recommend following our comprehensive step-by-step guide on how to create your new network.
- If you haven’t set up your iOS Push Certificate on the Amity Console, we highly recommend following our step-by-step tutorial on how to set up iOS push notifications. This will provide you with the essential foundation needed to proceed confidently and make the most out of the upcoming tutorial on effectively managing push notifications.
Step 1: Create new iOS Project
- Launch Xcode.
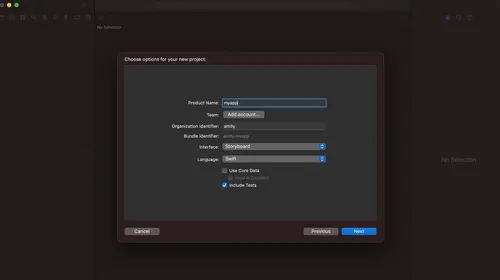
- Create a new project by going to “File” > “New” > “Project”;
- Choose the “App” template under the “iOS” tab;
- Enter the project name, organization identifier, and select your preferred language (we’ll select Swift for this tutorial);
- Configure project options and select source control if desired;
- Choose a location for your project repository;
- Click “Create” to create your project. Xcode will open with your project ready for development.

Step 2: Install Amity SDK
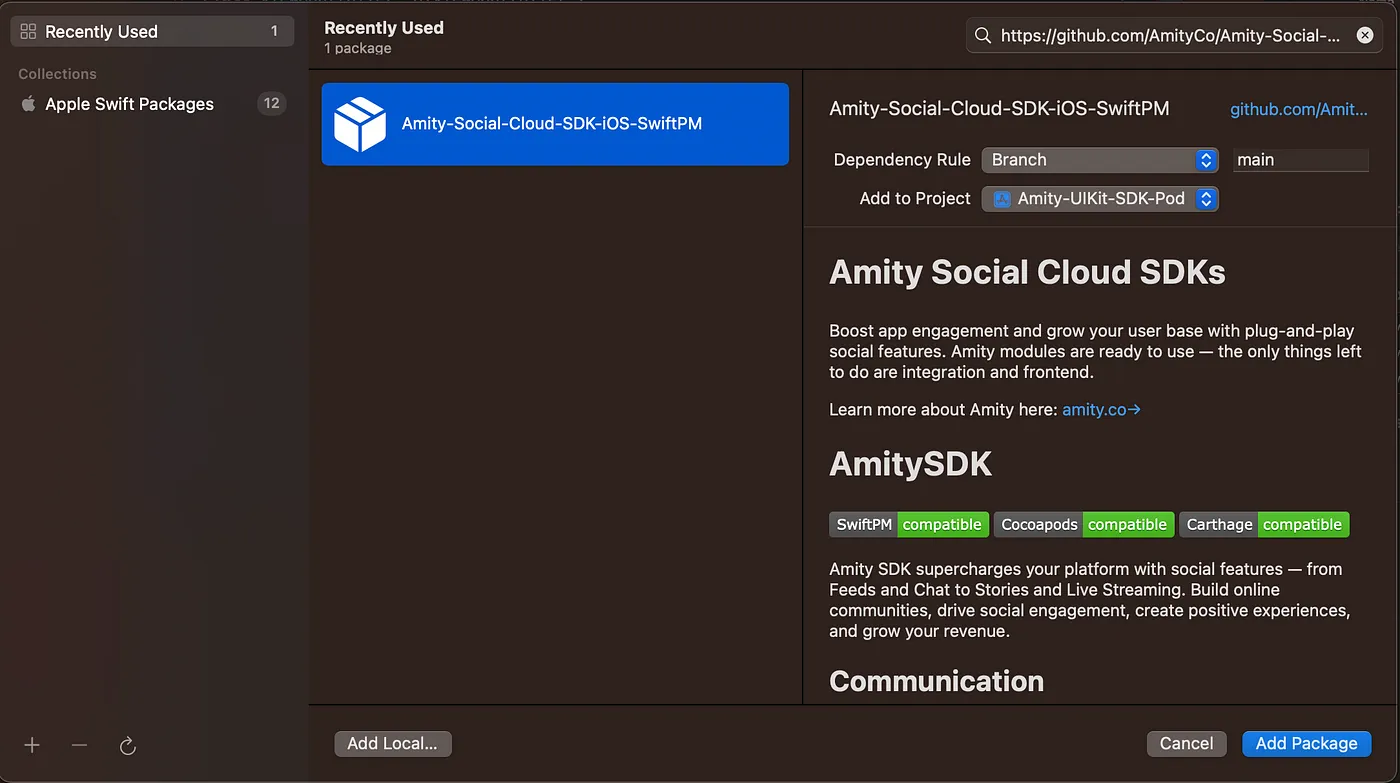
- Navigate to “File” > “Add Packages”
- Enter this repository URL https://github.com/AmityCo/Amity-Social-Cloud-SDK-iOS-SwiftPM to search the package, and choose to install Amity SDK.

3. Once the installation is complete, navigate to AppDelegate.swift
4. Add this function here to register the app for push notification and save device token to the local database, we’ll need the token later to register push notification with Amity SDK.
Step 3: Initiate Amity Client
- Navigate to your ViewController.swift
- First, import Amity SDK like this at the top of the file
3. Create a class variable called “client” and “sessionHandler”, we’ll create MySessionHandler class in the next step.
4. Paste this class into the ViewController as another class.
5. In your viewDidLoad method, assign AmityClient object to the “client” variable. You should be able to retrieve Amity API Key from your Amity Console.
6. Now we will login the user with the following code.
Step 4: Register push notification with Amity SDK
- Paste this code in your viewDidLoad method, after the Amity login method, this code will get the device token value that we save earlier in step 2 and use it to register push notification with Amity server.
Now you should be able to receive notifications directly from Amity when there’s action happening in your Chat & Social !
Please note that you have to test the notification on your device only so you need to archive the app to Testflight first in order to test this.
Final Thoughts
In this tutorial we’ve demystified the process of seamlessly integrating push notifications into your app using the Amity SDK. You’ve navigated the steps from iOS project setup to registering push notifications, equipping yourself with essential tools for boosting user engagement.
By meticulously following each step outlined in this tutorial, you’ve harnessed the capability to deliver timely notifications that enhance user interactions. As you move forward, remember that effective app development requires a blend of innovation and strategic implementation.
With these insights, you’re now empowered to craft apps that captivate users and thrive in the competitive app landscape. Embrace the power of push notifications and unlock a new realm of engagement possibilities for your app’s success.
And if you find yourself craving personalized guidance or have specific questions, don’t hesitate to reach out to us, our dedicated team is ready to assist you, offering their expertise and support to ensure your success.


